

Table of Contents
- Why Chiller Maintenance Decides How Long Your Cold Plunge Lasts
- Your Daily and Weekly Cold Plunge Chiller Maintenance Routine
- Cold Plunge Water Sanitation: pH, Alkalinity, and Sanitizer Balance
- How to Clean a Cold Plunge Filter Without Damaging It
- Cold Plunge Chiller Troubleshooting: Error Codes, Noise, and Weak Flow
- Draining, Deep Cleaning, and Winterizing Your Cold Plunge
- Energy Efficiency, Water Quality, and When to Call for Support
- Frequently Asked Questions
Last Updated: September 10, 2026
Why Chiller Maintenance Decides How Long Your Cold Plunge Lasts
A cold plunge chiller maintenance guide matters because the chiller is the hardest-working component in your entire recovery setup. It runs for hours at a time, pulls heat out of hundreds of gallons of water, and pushes that heat into the air around it. Neglect it, and you replace a compressor instead of a filter.
Chillers that fail early almost always failed slowly first. Dirty coils, clogged filters, and drifting water chemistry shorten equipment life long before a part actually breaks.
The good news is that most of this work takes minutes per week. Below, we'll show you exactly what to check daily, what to clean weekly, and how to spot a problem before it becomes a repair bill.
Your Daily and Weekly Cold Plunge Chiller Maintenance Routine
A daily and weekly routine prevents the majority of chiller failures. Daily checks take under two minutes. Weekly tasks take about fifteen.
Daily Water Checks and Debris Removal
Start with a visual pass. Skim leaves, hair, and surface film before they sink and break down.
- Check water clarity and note any cloudiness
- Remove visible debris with a skimmer or fine net
- Confirm the circulation pump is running and water is moving
- Glance at the set temperature and confirm the chiller is holding it
A common mistake is ignoring a slightly cloudy tub for a few days. Cloudiness usually means the filter is loading up or sanitizer has dropped, and both stress the chiller.
Weekly Condenser Coil Cleaning and Ventilation Checks
Condenser coils release the heat your chiller removes from the water. When they mat over with dust and lint, the compressor works harder and runs hotter.
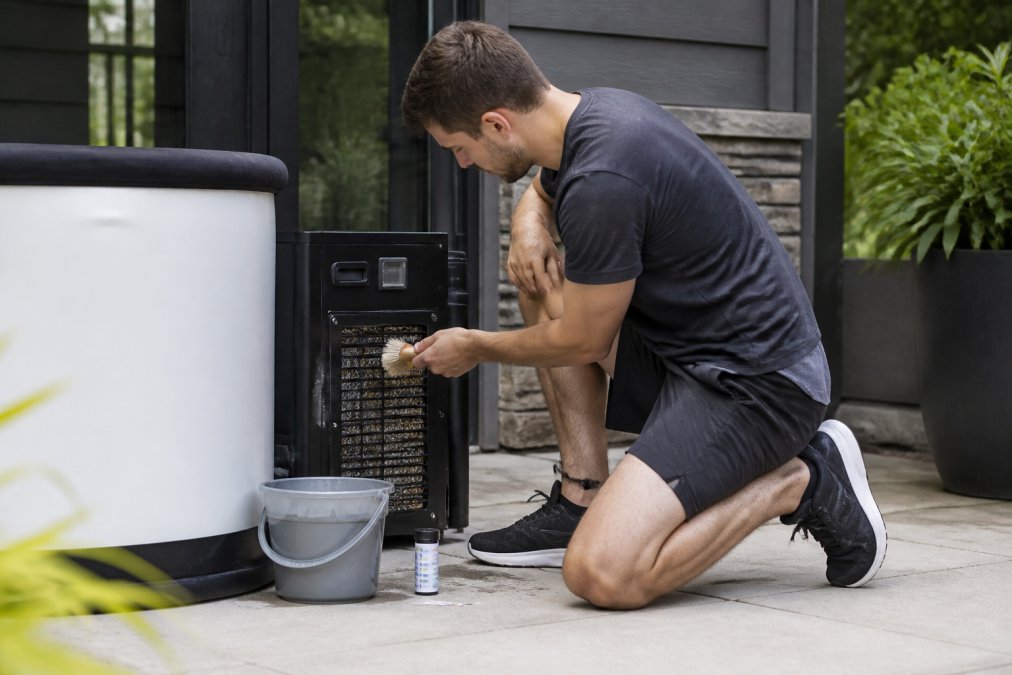
Unplug the unit, then brush or vacuum the coils gently. Check that the ventilation gap around the chiller is clear, with nothing stacked against the vents. Confirm the ambient temperature where the chiller sits stays reasonable; a hot, enclosed corner forces the unit to fight itself.
Cold Plunge Water Sanitation: pH, Alkalinity, and Sanitizer Balance
Cold plunge water sanitation keeps both your water and your equipment healthy. Balanced water protects metal components; unbalanced water attacks them.
Use test strips or a liquid test kit and check these regularly:
| Parameter | What It Affects | Why It Matters |
|---|---|---|
| pH | Sanitizer efficiency, metal parts | Low pH corrodes the heat exchanger (the CDC) |
| Alkalinity | pH stability | Low alkalinity lets pH swing wildly |
| Calcium hardness | Scale and corrosion | High hardness scales the chiller internals |
| Sanitizer level | Biofilm and bacteria | Low sanitizer grows biofilm in plumbing |
Biofilm is the quiet killer here. It forms inside plumbing connections and the filter housing, and once established it is stubborn. Keeping sanitizer in range prevents it from taking hold.
Eco-Friendly Sanitization: Ozone and UV Options
Ozone generators and UV sterilization reduce reliance on traditional chemicals (the CDC). Ozone oxidizes contaminants and breaks down cleanly; UV sterilization neutralizes microorganisms as water passes the lamp. Both work best alongside a small residual sanitizer rather than replacing it entirely, and both still require you to keep pH and alkalinity in range.
How to Clean a Cold Plunge Filter Without Damaging It
Knowing how to clean a cold plunge filter correctly extends both filter and pump life. Rinse, soak, and inspect, in that order.
- Power down the chiller and pump before touching the filter.
- Remove the cartridge and rinse it with a hose, working from the top down.
- Soak the cartridge in a filter cleaner to lift oils and minerals.
- Rinse thoroughly until water runs clear.
- Inspect the pleats and the gasket seal for cracks or flattening.
- Reinstall, prime the pump, and confirm normal flow rate.
Never scrub a cartridge with a stiff brush. It tears the pleats and lets debris bypass the filter entirely. Sediment filters and cartridges both have a service life; replace them on schedule rather than cleaning indefinitely.
Cold Plunge Chiller Troubleshooting: Error Codes, Noise, and Weak Flow
Chiller troubleshooting starts with the error code, not with guesswork. Most units display a code that points to one of a few common causes: restricted flow, overheating, or a sensor fault. Read the code, then work the list below in order, cheapest and simplest first.
Reading Error Codes and Restoring Flow
A flow-related code almost always means the filter is clogged, the pump needs priming, or there is an airlock in the lines. Work in this order:
- Pull the filter cartridge and inspect it. A loaded cartridge is the most common cause of a flow code.
- Confirm the pump is primed. Crack the bleed screw or the union at the pump discharge until water, not air, escapes.
- Look for kinks, closed valves, or a collapsed hose on the return side.
- Check the water level. A level below the suction inlet lets the pump pull air and trips the same code.
An overheating code points to airflow. Clear the vents, clean the condenser coils, and check the ambient temperature around the unit. A chiller in a closed cabinet or a hot garage can overheat even with clean coils.
A sensor fault is different. If the code persists after you have confirmed real flow and real airflow, the temperature or flow sensor itself may be reading wrong. Do not keep resetting the unit and running it, a sensor fault that masks a real overheating condition is how compressors die.
Diagnosing Pump Noise: Cavitation vs. Bearing Failure
Most guides stop at "check the pump." The sound tells you which failure you actually have, and the two have very different fixes.
Cavitation sounds like gravel or marbles rattling inside the pump housing. It happens when the pump pulls air or when the suction side is starved, low water level, a clogged filter, a partially closed valve, or an undersized suction line. The impeller is not damaged yet, but the collapsing vapor bubbles erode it over time. Fix the cause: top off the water, clean the filter, open the valve, and re-prime. Cavitation usually clears the moment flow is restored.
Bearing failure sounds like a continuous grinding, whining, or metal-on-metal growl that does not change when you adjust flow. It gets louder as the pump warms up. This is mechanical wear in the motor or shaft bearings, and it does not fix itself. A pump with failing bearings will eventually seize and can draw enough current to trip a breaker. Plan a replacement rather than a repair.
Dry running is a third pattern: the pump hums but moves no water, and the housing gets hot to the touch. It is almost always a priming or water-level problem. Shut it off immediately, a pump run dry for even a few minutes can destroy the shaft seal.
When the Code Is Not the Problem
If the chiller cools but short-cycles, running for a few minutes, shutting off, then restarting, the issue is often airflow or a refrigerant charge problem, not the electronics. Clean the coils, confirm the ventilation gap, and if short-cycling continues, that is a technician call. Refrigerant work requires a license and gauges you should not improvise.
Draining, Deep Cleaning, and Winterizing Your Cold Plunge
A full drain and deep clean keeps water chemistry manageable and protects the chiller from scale. Most home setups benefit from a water change every few months, more often with heavy use.
To drain and deep clean:
- Power down the chiller, pump, and any ozone or UV system.
- Open the drain valve and empty the tub completely.
- Wipe the shell and clean the filter housing and plumbing connections.
- De-scale the chiller's water side if you see mineral buildup.
- Refill, balance the water, and run the pump to prime the system.
Winterization matters if the tub sits in an unheated space. Water left in the chiller, pump, and lines can freeze and crack the heat exchanger (extension.psu.edu). Drain the equipment fully, or keep the unit running and heated in a space above freezing.
Energy Efficiency, Water Quality, and When to Call for Support
This is where most guides stop, and it is where the real money and equipment life are. A chiller is one of the largest continuous electrical loads in a home recovery setup, and the water you feed it determines how hard it has to work.
Cutting Chiller Energy Use Without Cutting Performance
Energy efficiency comes down to four levers, in order of impact:
- Coil cleanliness. Matted condenser coils are the single biggest efficiency killer. A coil that cannot reject heat forces the compressor to run longer and hotter. Clean them on the weekly schedule above.
- Airflow and ambient temperature. A chiller in a shaded, ventilated spot runs less than one in a hot, enclosed corner. Even a few degrees of ambient difference changes how often the compressor cycles. Keep the ventilation gap clear and get the unit out of direct sun.
- Insulation and a cover. An insulated tub with a fitted cover holds cold water far longer between cooling cycles. This is the cheapest efficiency upgrade most owners can make, and it also cuts evaporation and chemical demand.
- Setpoint discipline. Every degree colder you set the water is more compressor runtime. If you are not using the tub for hours, raising the setpoint a few degrees and lowering it before a session saves real energy over a week.
A chiller that is not fighting dust, heat, and an uncovered tub uses noticeably less power to hold the same temperature. If your unit runs almost constantly, the problem is usually one of these four, not the compressor.
Matching Maintenance to Your Source Water
Water quality testing should account for your source water, because hard and soft water fail chillers in opposite ways.
Hard water carries high calcium and magnesium. Heat is the enemy here: the chiller's heat exchanger is the hottest wetted surface in the system, and dissolved minerals precipitate onto it as scale. Scale insulates the exchanger, forcing higher head pressure and longer runtimes, and it is the leading cause of premature chiller failure in hard-water areas. Test hardness, keep calcium hardness in the recommended range, and de-scale the water side on the drain-and-clean schedule. A water softener or a pre-filter on the fill line reduces how fast scale builds.
Soft or filtered water behaves differently. It is low in the minerals that buffer pH, so it swings more easily and can turn aggressive toward metal, low-pH soft water attacks the heat exchanger and pump internals from the inside. Soft water also holds sanitizer differently, so you may need to adjust dosing. Test alkalinity and pH more often, and add a hardness or alkalinity buffer if the water will not hold a stable reading.

Either way, test your source once, note the numbers, and build your routine around them instead of guessing. A $15 test kit tells you more about your chiller's lifespan than any cleaning schedule alone.
When to Call for Support
Some problems warrant a call. Persistent error codes after basic troubleshooting, a compressor that will not start, refrigerant issues, or any electrical fault are jobs for a qualified technician. Electrical safety is not a DIY category.
For a system designed to make this routine simpler, the FCP Premium XL 120 Gal Cold Plunge Tub Kit With 1HP Chiller, Filter, And Pump pairs a matched chiller, filter, and pump so the components are sized to work together from day one.

Frequently Asked Questions
How often should I change the water in my cold plunge?
Most home cold plunge owners change water every 4 to 8 weeks, depending on use and sanitation. With regular cold plunge water sanitation, including balanced pH and sanitizer, you can stretch that interval. Heavy daily use, visible cloudiness, or a strong odor means it is time to drain and refill. Pair water changes with a full filter rinse and a wipe-down of the tub walls to remove biofilm before refilling.
Do cold plunge chillers require special cleaning solutions?
Use cleaners made for chillers and acrylic or fiberglass tubs, not household bleach or abrasive scrubbing pads. For routine work, a diluted mild detergent and a soft cloth handle most grime. If you see scale on the heat exchanger, a de-scaling solution designed for chillers restores flow and cooling. Always rinse thoroughly before refilling, because leftover cleaner can throw off pH levels and irritate skin. Check your chiller manual for the cleaner the manufacturer approves.
What are the signs that my cold plunge chiller needs maintenance?
Watch for water that will not reach your set temperature, longer cooling cycles, weak circulation pump flow, unusual rattling or humming, and error codes on the controller. Warm condenser coils, a clogged sediment filter, or low water flow from a dirty filter are common causes. Address these early: a quick coil cleaning, filter rinse, and water chemistry check often solves the problem before it becomes a repair.
How do I winterize a cold plunge chiller for long-term storage?
Drain the tub and chiller completely, including the heat exchanger and plumbing connections, so no water sits inside and freezes. Remove and dry the filter, then clean the tub with a mild cleaner. Store the chiller in a dry spot above freezing, and cover the tub to keep out debris. Before the next season, inspect the gasket seal, prime the pump, and refill with balanced water so your first plunge runs cold and clean.
Cold plunge chiller maintenance is the difference between a system that lasts years and one that needs replacing. Essential Life Vitality offers curated cold plunge systems and home wellness equipment designed for durability and easy upkeep, backed by free shipping on most orders within the continental U.S. and a support team reachable by phone, email, or live chat. Get started with Essential Life Vitality and build a recovery routine that holds up season after season.